

(guest post by Mikkie Mills)
Oftentimes our homes start to look a little drab as the seasons wear on and your glass doors or barndoor hardware need a little more love and excitement. A great way to dress up your house for fall is to install and arrange autumn-themed window boxes. This is an easy and fun way to improve the outside of your home for the coming cooler season.
To begin, you will need the following tools:
- Cordless drill with a Phillips tip
- A 4-foot and 2-foot level
- Tape measure
- Combination countersink/counterbore bit
And the following items:
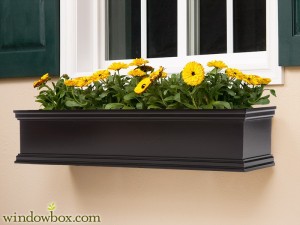
- A window box
- Two window box brackets (if you do a box longer than 48 inches you will need a third bracket)
- 2 ½-inch decking screws


Photos courtesy Windowbox.com
- First mark the mounting location for where you want your box to hang. If your windows are double-hung or sliding, measure about 1 inch down from the underside of the sill right below one side of the frame and mark. This mark will be where the top of one of your brackets will go.
- If your windows swing out, measure six to eight inches down.
- To install the top screws for your brackets, hold the first bracket with the top of it touching your mark.
- From here, use the countersink bit on the cordless rill and bore a pilot hole and counterbore into the bracket on that mark.
- Fasten the bracket to the wall with a galvanized decking screw through the pilot hole (about a 3-inch-long screw).
- Your third step is to check for plumb and install a second screw.
- Hold the 2-foot level against the side of your bracket to make sure it’s plumb.
- Now bore another pilot hole and counterbore for your second screw through the bracket above the horizontal leg (it will be hidden by the box).
- Drive a second 3-inch decking screw into your bracket.
- You can now install your second bracket for your window box. Hold the bracket in the correct position under the sill and line it up with the frame.
- Place your 4-foot level across the brackets and move the second bracket until both brackets are level.
- You will now drill another pilot hole and counterbore into the bracket by the bottom of the siding just like in Step 2.
- To attach the bracket to the house, follow Step 3 to check for plumbing the bracket and drive the second screw in. Don’t forget to use your 3-inch decking screw.
- You are now ready to attach your window box. Place the empty box on top of your two brackets. Make sure that the angled side faces out.
- You can center the box by measuring the overhang on your brackets.
- To fasten your window box to the brackets, drill and counterbore pilot holes to the upper back edge of the window box, right in front of each bracket.
- Drive a 2 ½-inch decking screw through the box and through the upper end of brackets.
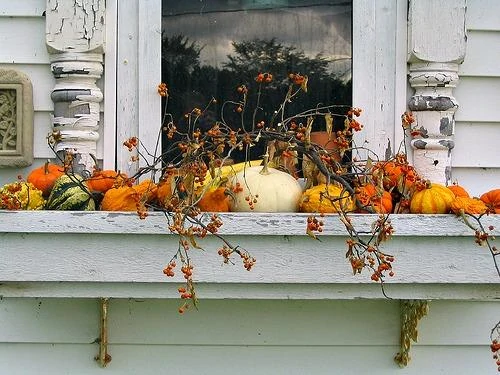
If you’re worried about your lack of a green thumb, you don’t have to plant live plants in your window box. For a longer-lasting décor, place faux vines and a few small pumpkins in the window box.

Photo via Common Ground
Large pine cones and cranberry vines with faux squash are also a beautiful way to give the outside of your home a little face lift and autumn love.

Photo via Common Ground
